The Engineering Behind a Floor With No Step
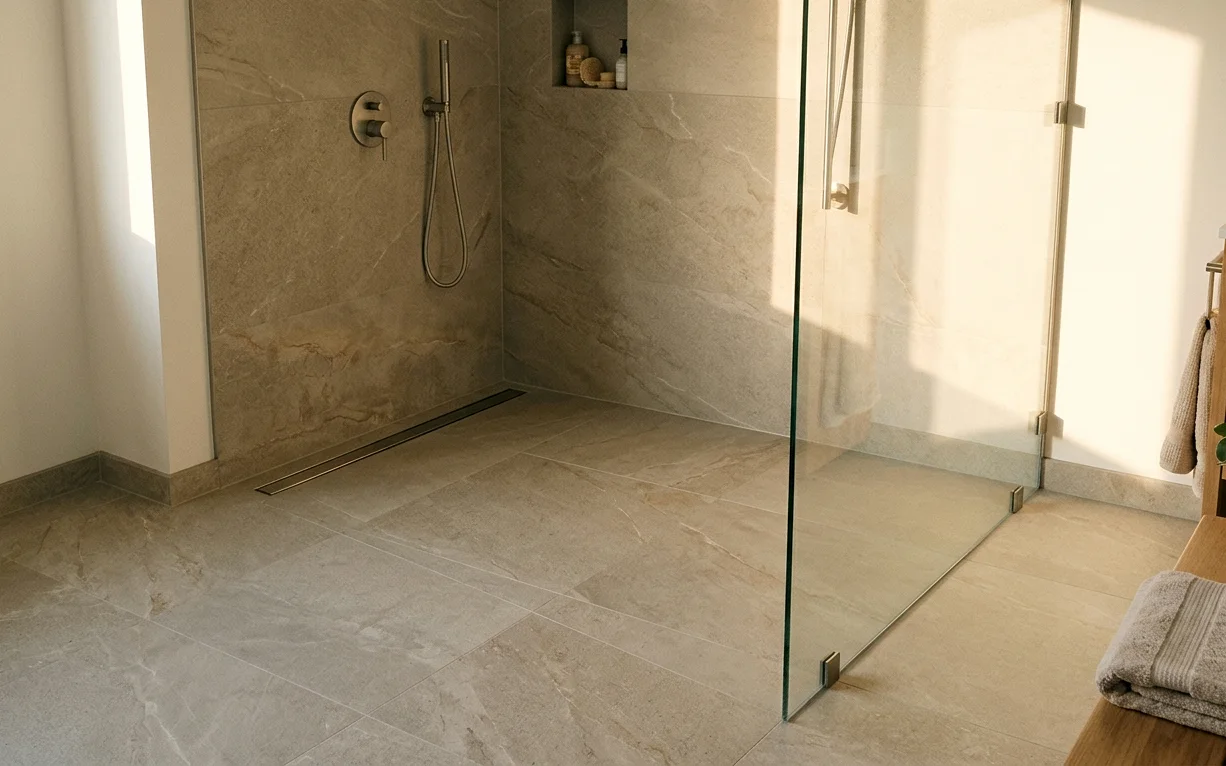
In a standard shower, a curb a few inches tall holds water in. Take the curb away and gravity has to do the job. The shower floor must sit lower than the floor outside it, sloping toward a drain, so water never reaches the bathroom side even when someone stands near the opening.
Builders have a few ways to get that drop. On a slab, we cut out and lower the concrete in the shower area so the tile can slope down from the room. On a wood subfloor, the joists can be notched or the subfloor recessed between them, or the rest of the bathroom floor can be raised to meet the shower. Each approach has its own cost, and the right one depends on what’s under your floor.
Lowering a Slab for a Curbless Shower
Most homes around San Antonio sit on slab foundations, and that’s where curbless work gets real. We saw-cut the shower area, break out the top layer of concrete to the depth needed, and check for post-tension cables before any cutting. A post-tensioned slab needs a scan first, because cutting a cable is a serious structural problem.
With the recess formed, we reroute the drain to the new location, rebuild the base with a sloped mortar bed or a preformed tray, and tie in the waterproofing. Expansive clay soils in this region mean slabs move a little over time, so we use a flexible membrane and soft joints at the corners rather than relying on grout alone. For background, our slab and drain guide explains what happens under the floor.
- Scan for post-tension cables before saw-cutting
- Keep cuts away from footings and grade beams
- Plan the drain route to tie in at proper slope
- Patch with a mix that bonds to existing concrete
Linear Drain or Center Drain?
A center drain needs the floor to slope from all four sides, like a shallow funnel. That works, but it limits tile to smaller pieces that can follow the angles. A linear drain sits along one wall or at the entry and lets the floor slope in one direction, which suits large-format porcelain and keeps the slope gentle underfoot.
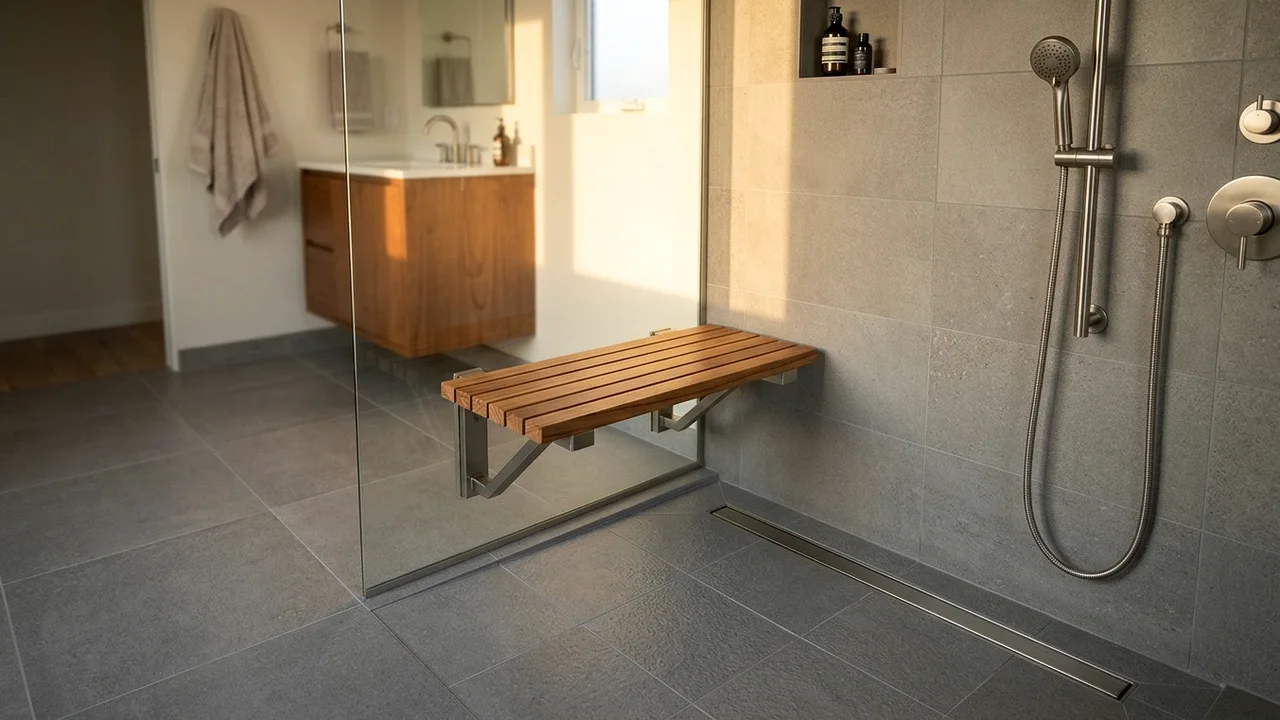
We usually recommend a linear drain along the back wall for curbless showers. It keeps water away from the entrance and leaves the floor flat enough to feel steady. An entry-side linear drain is another option in tight bathrooms, catching any water before it crosses into the room.
Drain grates come in several looks. A slotted stainless cover is the most common and easy to lift for cleaning. A tile-in grate holds a strip of the floor tile, so the drain almost disappears. Whichever you pick, plan to lift it every few weeks and clear hair and soap buildup, since San Antonio’s hard water leaves scale that narrows the channel over time.
Step by Step: How a Curbless Shower Gets Built
This is not a quick shower swap. The sequence below is what keeps a curbless floor dry for years.
- Design the layout, choose the drain type and confirm glass placement
- Scan the slab, then saw-cut and remove concrete in the shower zone
- Relocate the drain and pass any required plumbing inspection
- Build the sloped base and patch the surrounding slab
- Apply waterproofing across the shower and at least a few feet into the room
- Flood test the entire wet area before tile
- Install floor and wall tile, then fixed glass or a hinged panel
Glass, Splash and Keeping Water Where It Belongs
Without a curb, glass placement matters more. A fixed panel that covers most of the shower opening blocks spray while leaving an open walk-in entry. The showerhead should point away from the opening, and a handheld can be aimed down instead of across the room.
We also extend the waterproof membrane past the shower into the main bath floor, because the floor outside a curbless shower will get wet. With frequent hot showers during humid Texas summers, a strong exhaust fan on a timer helps the whole room dry faster. Our glass panel options cover fixed and hinged layouts that work without a curb.
Who Gets the Most Out of a Curbless Shower
People choose curbless showers for two reasons: they love the look, or they want to stay in the house as mobility changes. Often it’s both. A floor with no step is safer for anyone with balance concerns, easier for a rolling shower chair, and simply nicer for everyone else.
It’s also a strong choice in a primary bath remodel because it opens up the room visually. Small bathrooms benefit too, since the floor tile runs right through and the room reads larger. If you’re planning wider changes for mobility, see our accessible bathroom remodel page. If you’re still weighing your options, call us and a designer will check your floor and talk through what it would take.
Projects that often go with curbless shower installation
Walk-In Shower Installation
A walk-in shower looks simple: tile, a drain and a sheet of glass. The part that decides whether it lasts is underneath, in the slope, the pan and the membrane, and that’s where we spend the most care.
Accessible Bathroom Remodel
An accessible bathroom is one you can still use comfortably when your knees, balance or eyesight change. We plan for the way you live now and the way you may want to live later, without making the room look clinical.
Bathroom Tile Installation
Good tile work is mostly preparation. Flat walls, a proper waterproof layer, and movement joints where the slab will shift decide whether a bathroom floor or shower stays crack free. We spend our time there, then set the tile carefully.
Frameless Glass Shower Doors
Heavy, clear glass with minimal hardware makes a shower look larger and lets the tile show. In a city with water this hard, though, the glass you pick and how you care for it matter as much as how it looks on day one.
Curbless Shower Installation questions
Can a curbless shower be built on a slab foundation in San Antonio?
Yes, and most of ours are. The concrete in the shower area is cut and lowered so the floor can slope toward the drain. Before cutting, we scan for post-tension cables. The work adds cost and time compared to a standard shower, but it’s routine when planned carefully.
Will water get onto my bathroom floor with a curbless shower?
Some splash is normal, which is why we extend waterproofing beyond the shower and slope the shower floor toward a linear drain. A fixed glass panel and a showerhead aimed away from the entrance keep most water in. A well-designed curbless shower stays drier than many people expect.
How long does a curbless shower installation take?
Plan on 2 to 4 weeks of work. Slab cutting and drain relocation take several days, then concrete patches cure before waterproofing. Flood testing, tile and glass follow. Larger showers or stone tile take longer. We give you a schedule during planning so you can arrange to use another bathroom.
What kind of tile works best on a curbless shower floor?
Slip-resistant porcelain is the most common choice. With a linear drain, large-format tiles work because the floor slopes in one direction. With a center drain, smaller tiles or mosaics follow the slope better. We bring samples rated for wet floors so you can feel the texture before choosing.
Is a curbless shower worth the extra cost over a low curb?
It depends on your goals. For full wheelchair access or a sleek look, curbless is worth it. If you just want an easier step-in, a low curb about two inches tall costs less and keeps most slab work off the table. We price both options so you can compare.